Thursday, April 27, 2017

Butterfly Dreams for Elizabeth Craft Designs

Hope to see you over at the Elizabeth Craft Designs Blog today for tutorial on how this lovely card came together.  Simply Click Here.

 
May all your dreams come true,

Saturday, April 22, 2017

Perrr-fect Weekend

Hi my friends,

Just dropping by to say - hope you have the perrr-fect weekend.  Here in Arizona we are having warm sunny days and all the cactus and trees are in bloom.  I made this totally Pinterest inspired card using some fun new and older dies from Elizabeth Craft Designs


Enjoy,


Sunday, April 16, 2017

Follow Your Dreams

Hi my friends,

Just stopping by to wish all of you a Happy Easter Day and share a canvas board that I made awhile back.   We are enjoying some wonderful weather here in the Southwest - warm and sunny.


I used the fabulous die set from Elizabeth Craft Designs - Dreamcatcher - from Joset Designs.  The sentiment is from Joset as well,  Dream Sentiments Clear Stamps.

Always follow your dreams,

Tuesday, April 11, 2017

Paper Pros Challenge

It's time once again for the Paper Pros monthly challenge and the thing I love about this is that there are no rules, no theme and no pressure.  Today I made a card using some Karen Burninston Pop it Ups dies a tag topper from Elizabeth Craft Designs and lots of Tim Holtz Remnant Rubs along with the Oxide Inks that everyone is so in love with.
 
 
I had some fun while making this card because I was never sure where it was going to end up but I like the results.
 

Starting with a folded standard card 4.25" x  5.5".


Next came the fun of using the new Ranger Oxide Distress Inks.  I put a few colors on a non stick craft mat, spritzed with water and then dragged the card through it. 
 
When I was happy with my color, I placed the Tag Pivot die on the center aligning the nibs of the die with the center fold.  After running it through my die cutting machine I folded the pivot toward the center of the card.
 
 
I used parts and pieces of several Remnant Rubs as desired.  The hot air balloon is one of Karen Burniston's - Hot Air Balloon Pop Up Card.
 
Have a great week,

Thursday, April 6, 2017

The Magic of Three

It's a new month and a new challenge at A Vintage Journey.  Our lovely hostess, Annie, has asked us to use the Magic of 3 and I took it quite literally right down to the word FLY. 
 
 
I did some stash diving for this one so sorry to say that I have no extra photos to share.
 
I used a canvas board for the backing, added 3 smaller canvases down the center.
I'm sure you will recognize some of the fun Tim Holtz items such as the wings and the gears in the center.  I found some Springly Sprockets that were hiding in my stash and added them.
When I was finished, I added a piece of black chipboard to frame it.
 
Pop on over to A Vintage Journey to see the great creations from the rest of the team.
 
Have a great weekend,

Wednesday, April 5, 2017

Pop it Up Wednesday

Hi friends,
 
Today I'm sharing fun Easter Card on the Elizabeth Craft Designs Blog.  Lucky the Rabbit is happy to find a colorful Easter Basket.  You can see all the details by clicking here.


See you there,

Tuesday, April 4, 2017

Glittery Background for Elizabeth Craft Designs Designers Challenge

Hi Friends,

It's the first Tuesday of the month and that means it's Designers Challenge day at Elizabeth Craft Designs.  This month we are challenged to make something with a glittery background and I decided to make an invitation for a special event.  The inside is still blank so the details can be added when they return from the printer. 

Continue reading to find out about a great giveaway from Elizabeth Craft Designs
 
 
Elizabeth Craft Designs have another designer challenge giveaway for you. We are giving away "3 x 1/2 oz containers of Silk Microfine Glitter in the colors of your choice"  to 3 winners. 
 
To enter simply leave a comment on the Elizabeth Craft Designs Challenge post and tell us "What is your favorite technique using Silk Microfine Glitter”
 
We will select 3 lucky winners in a random drawing 

The winners will be announced on Friday, April 7 on the Elizabeth Craft Designs blog.

*************
 
A few tips on how I made my project if you want to make one -
 

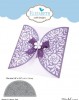
The finished size is 5.5" square.  I wanted to put a glittery backing behind the Gatefold - Elegant Rose die so cut a circle that is 5.5" in diameter.  The card base was cut 5.5" square and then 2 additional pieces were cut 5.5" X 3".  Crease the side panels at 1/2".


The circle was covered with ECD Double Sided Adhesive and cut in half.  Adhesive was added to side panels but not on the 1/2' side tabs.


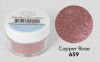
After removing the adhesive, ECD Microfine Glitter, Copper Rose, was added to the circle and polished.
Using the Gatefold - Elegant Rose die, cut the smaller panels lining up the die with the crease.
 
 
Peel adhesive from die cut and add to glittered panel.
 
 
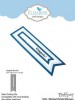
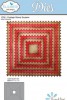
Assemble card. Add one panel to back of card using the Postage Stamp Squares.  Make a hole on either side of gatefold.  String ribbon through holes and tie closed.
 
Have a great week and make something glittery,